> ## Documentation Index
> Fetch the complete documentation index at: https://docs.avoca.ai/llms.txt
> Use this file to discover all available pages before exploring further.
# 3CX
> Set up your Avoca number in 3CX for after-hours and overflow coverage
In order for your calls to be routed to Avoca, your team needs to ensure that call forwarding is set up to route to an external number (your Avoca number). Once you've received the number from your Customer Success Manager, follow the steps below.
Each business's 3CX setup is slightly different — if these instructions don't match what you see, reach out to your Avoca Customer Success Manager or 3CX customer support for assistance.
## Setting Up Avoca for After-Hours
Log into 3CX and navigate to **Settings** in the left sidebar, then click **Call Forwarding** and **Away**.
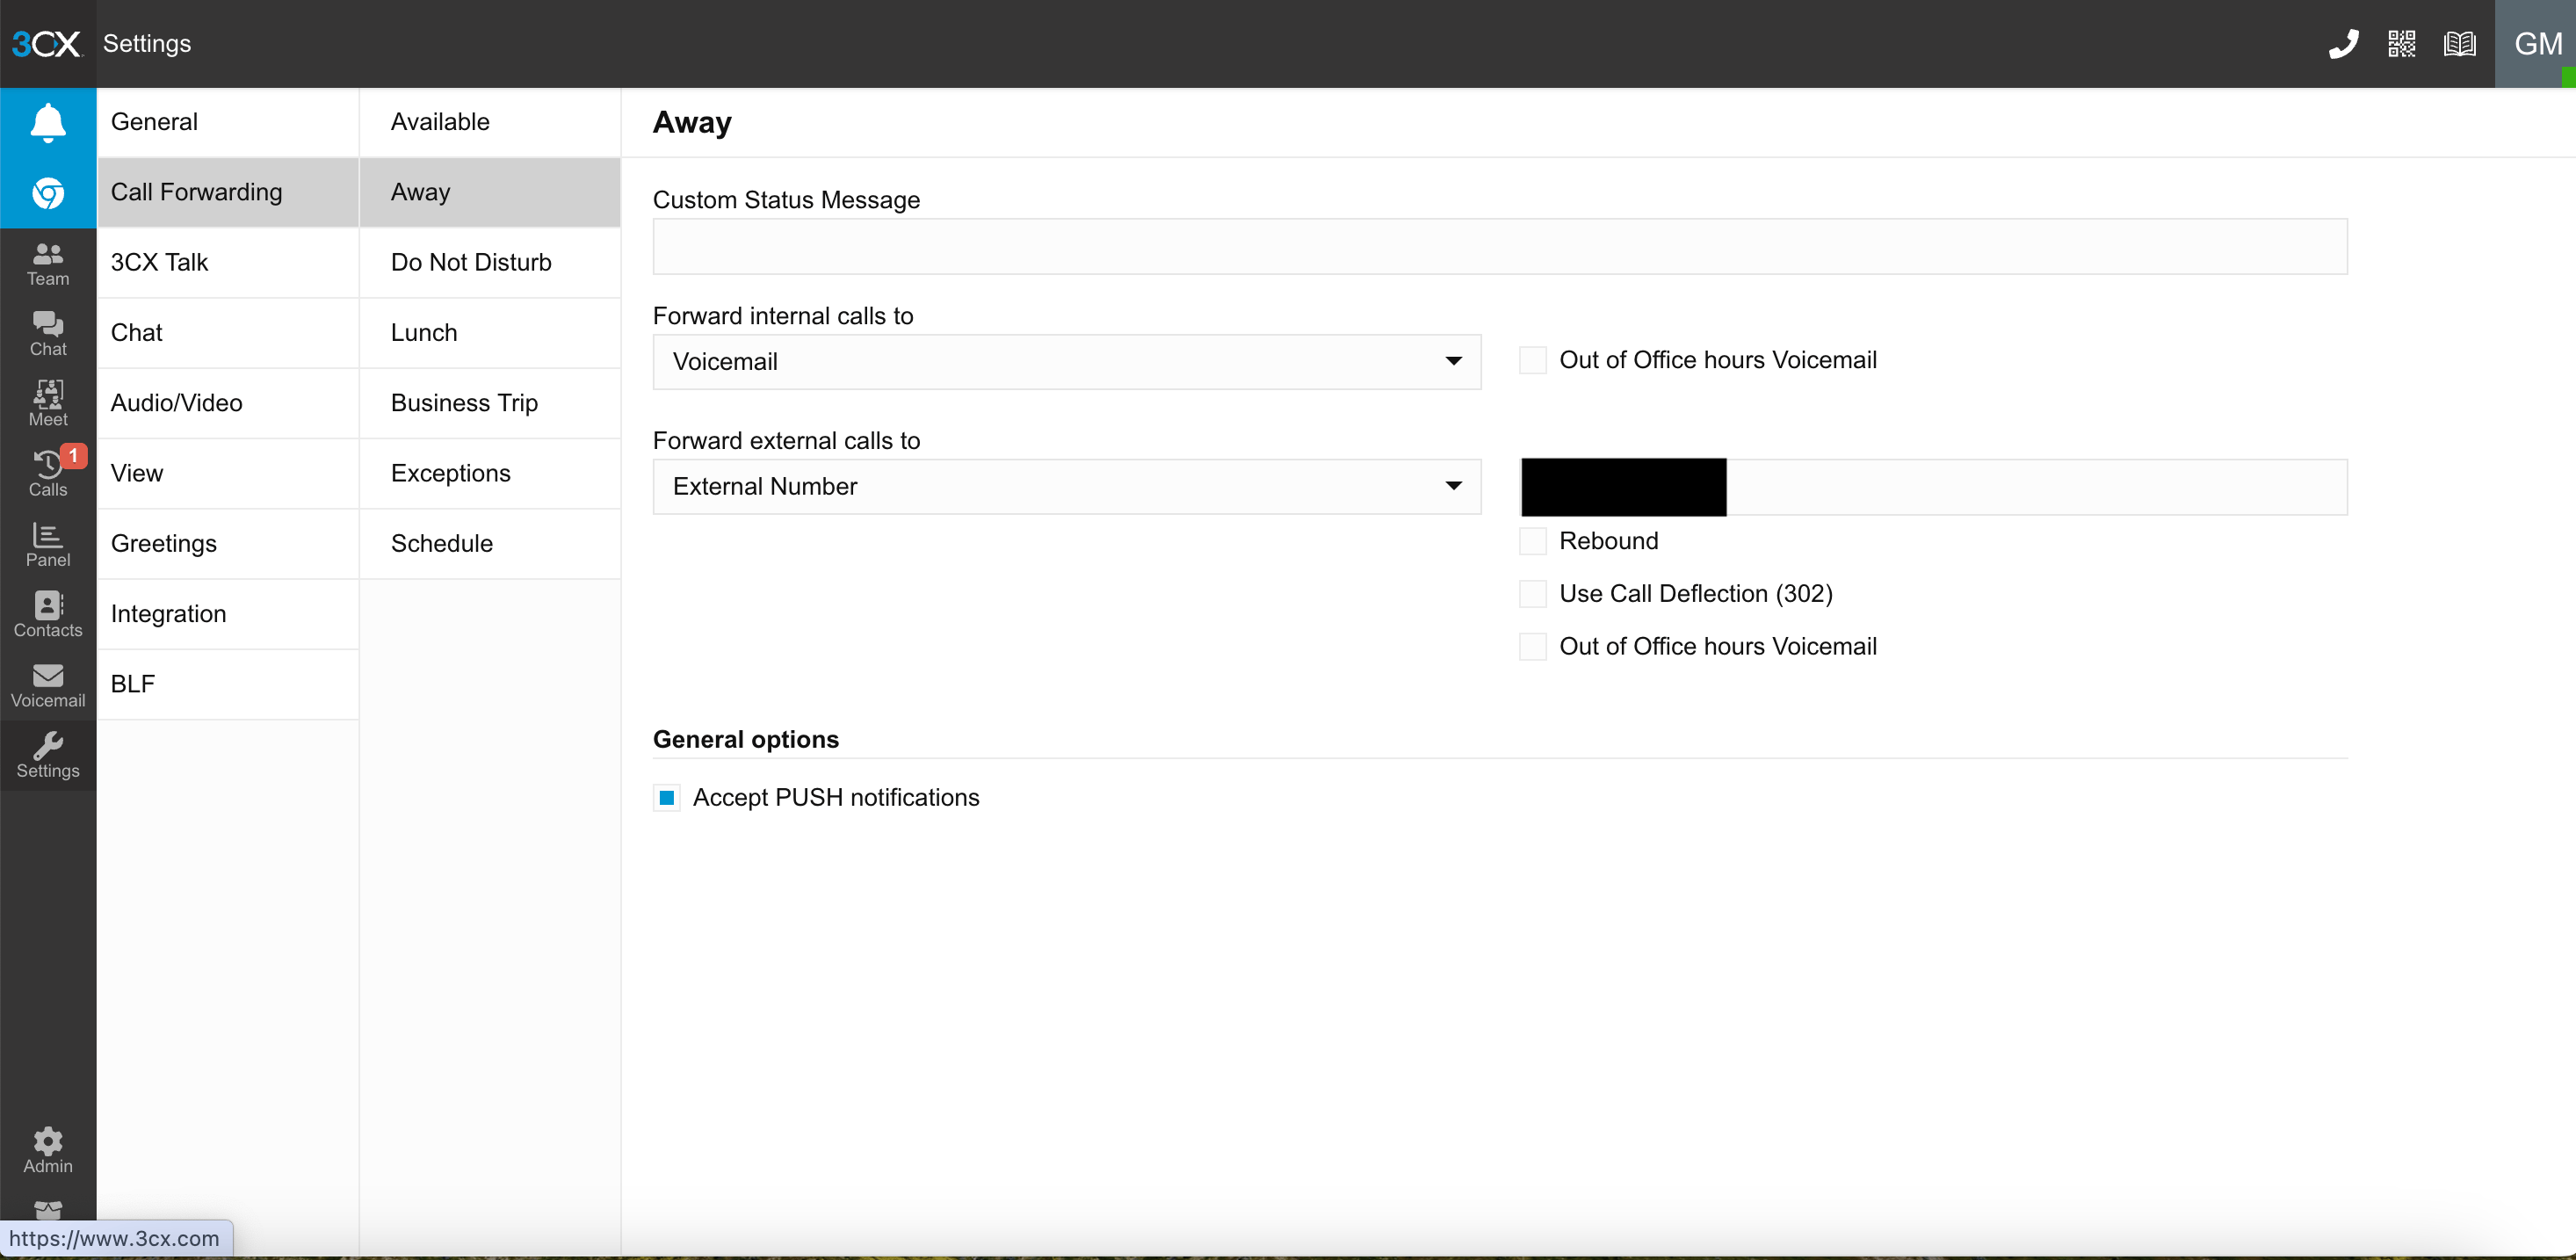 Open the **"Forward external calls to"** menu and select **External Number**. Enter your Avoca number in the field to the right.
You may need to remove any parentheses and spaces so the number is formatted in a way 3CX understands.
Open the **"Forward external calls to"** menu and select **External Number**. Enter your Avoca number in the field to the right.
You may need to remove any parentheses and spaces so the number is formatted in a way 3CX understands.
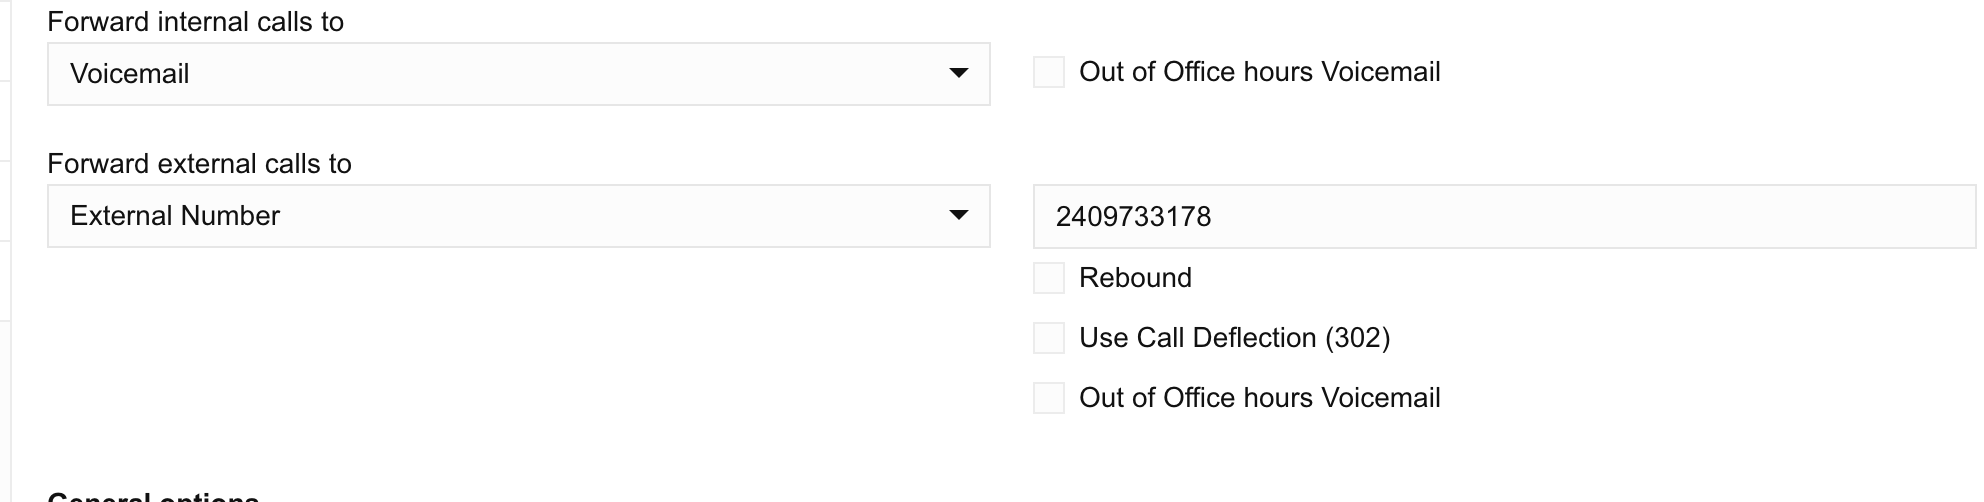 Changes save automatically, but refresh the page and confirm the number is still there.
Repeat step 2 for **Do Not Disturb**, **Lunch**, and **Business Trip** so you're forwarding to Avoca in all after-hours cases.
You may also need to configure your global office hours under **Settings → Time Zone & Office Hours**, depending on your setup.
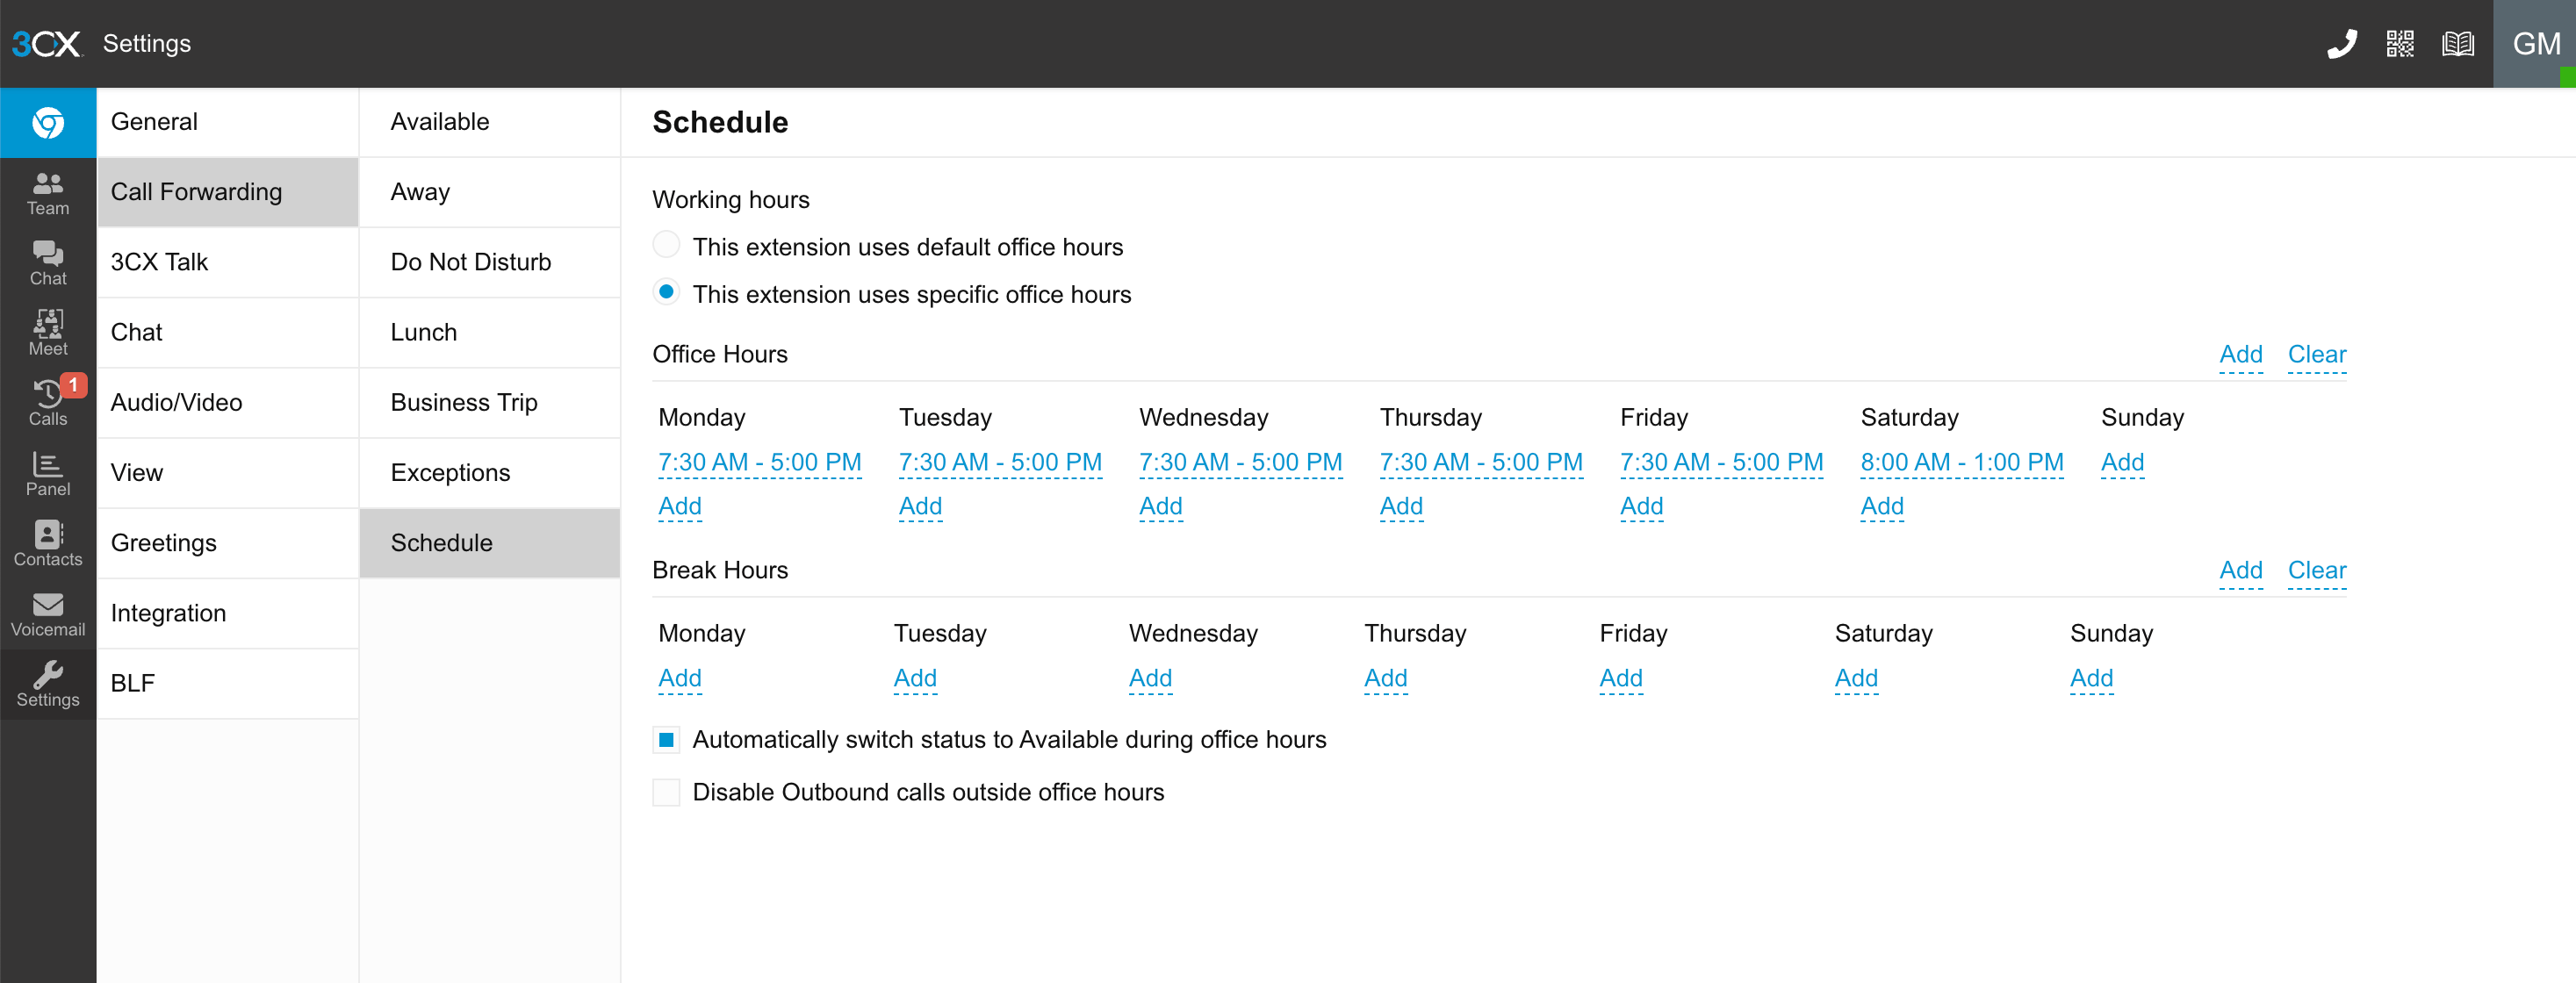
Navigate to **Call Forwarding → Schedule** and enter your call center hours. Enable **"Automatically switch status to Available during office hours"** — this makes the overflow setup below work reliably.
Changes save automatically, but refresh the page and confirm the number is still there.
Repeat step 2 for **Do Not Disturb**, **Lunch**, and **Business Trip** so you're forwarding to Avoca in all after-hours cases.
You may also need to configure your global office hours under **Settings → Time Zone & Office Hours**, depending on your setup.
Navigate to **Call Forwarding → Schedule** and enter your call center hours. Enable **"Automatically switch status to Available during office hours"** — this makes the overflow setup below work reliably.
 ## Setting Up Avoca for Overflow
This makes your phones ring first during business hours, then forwards to Avoca if nobody answers.
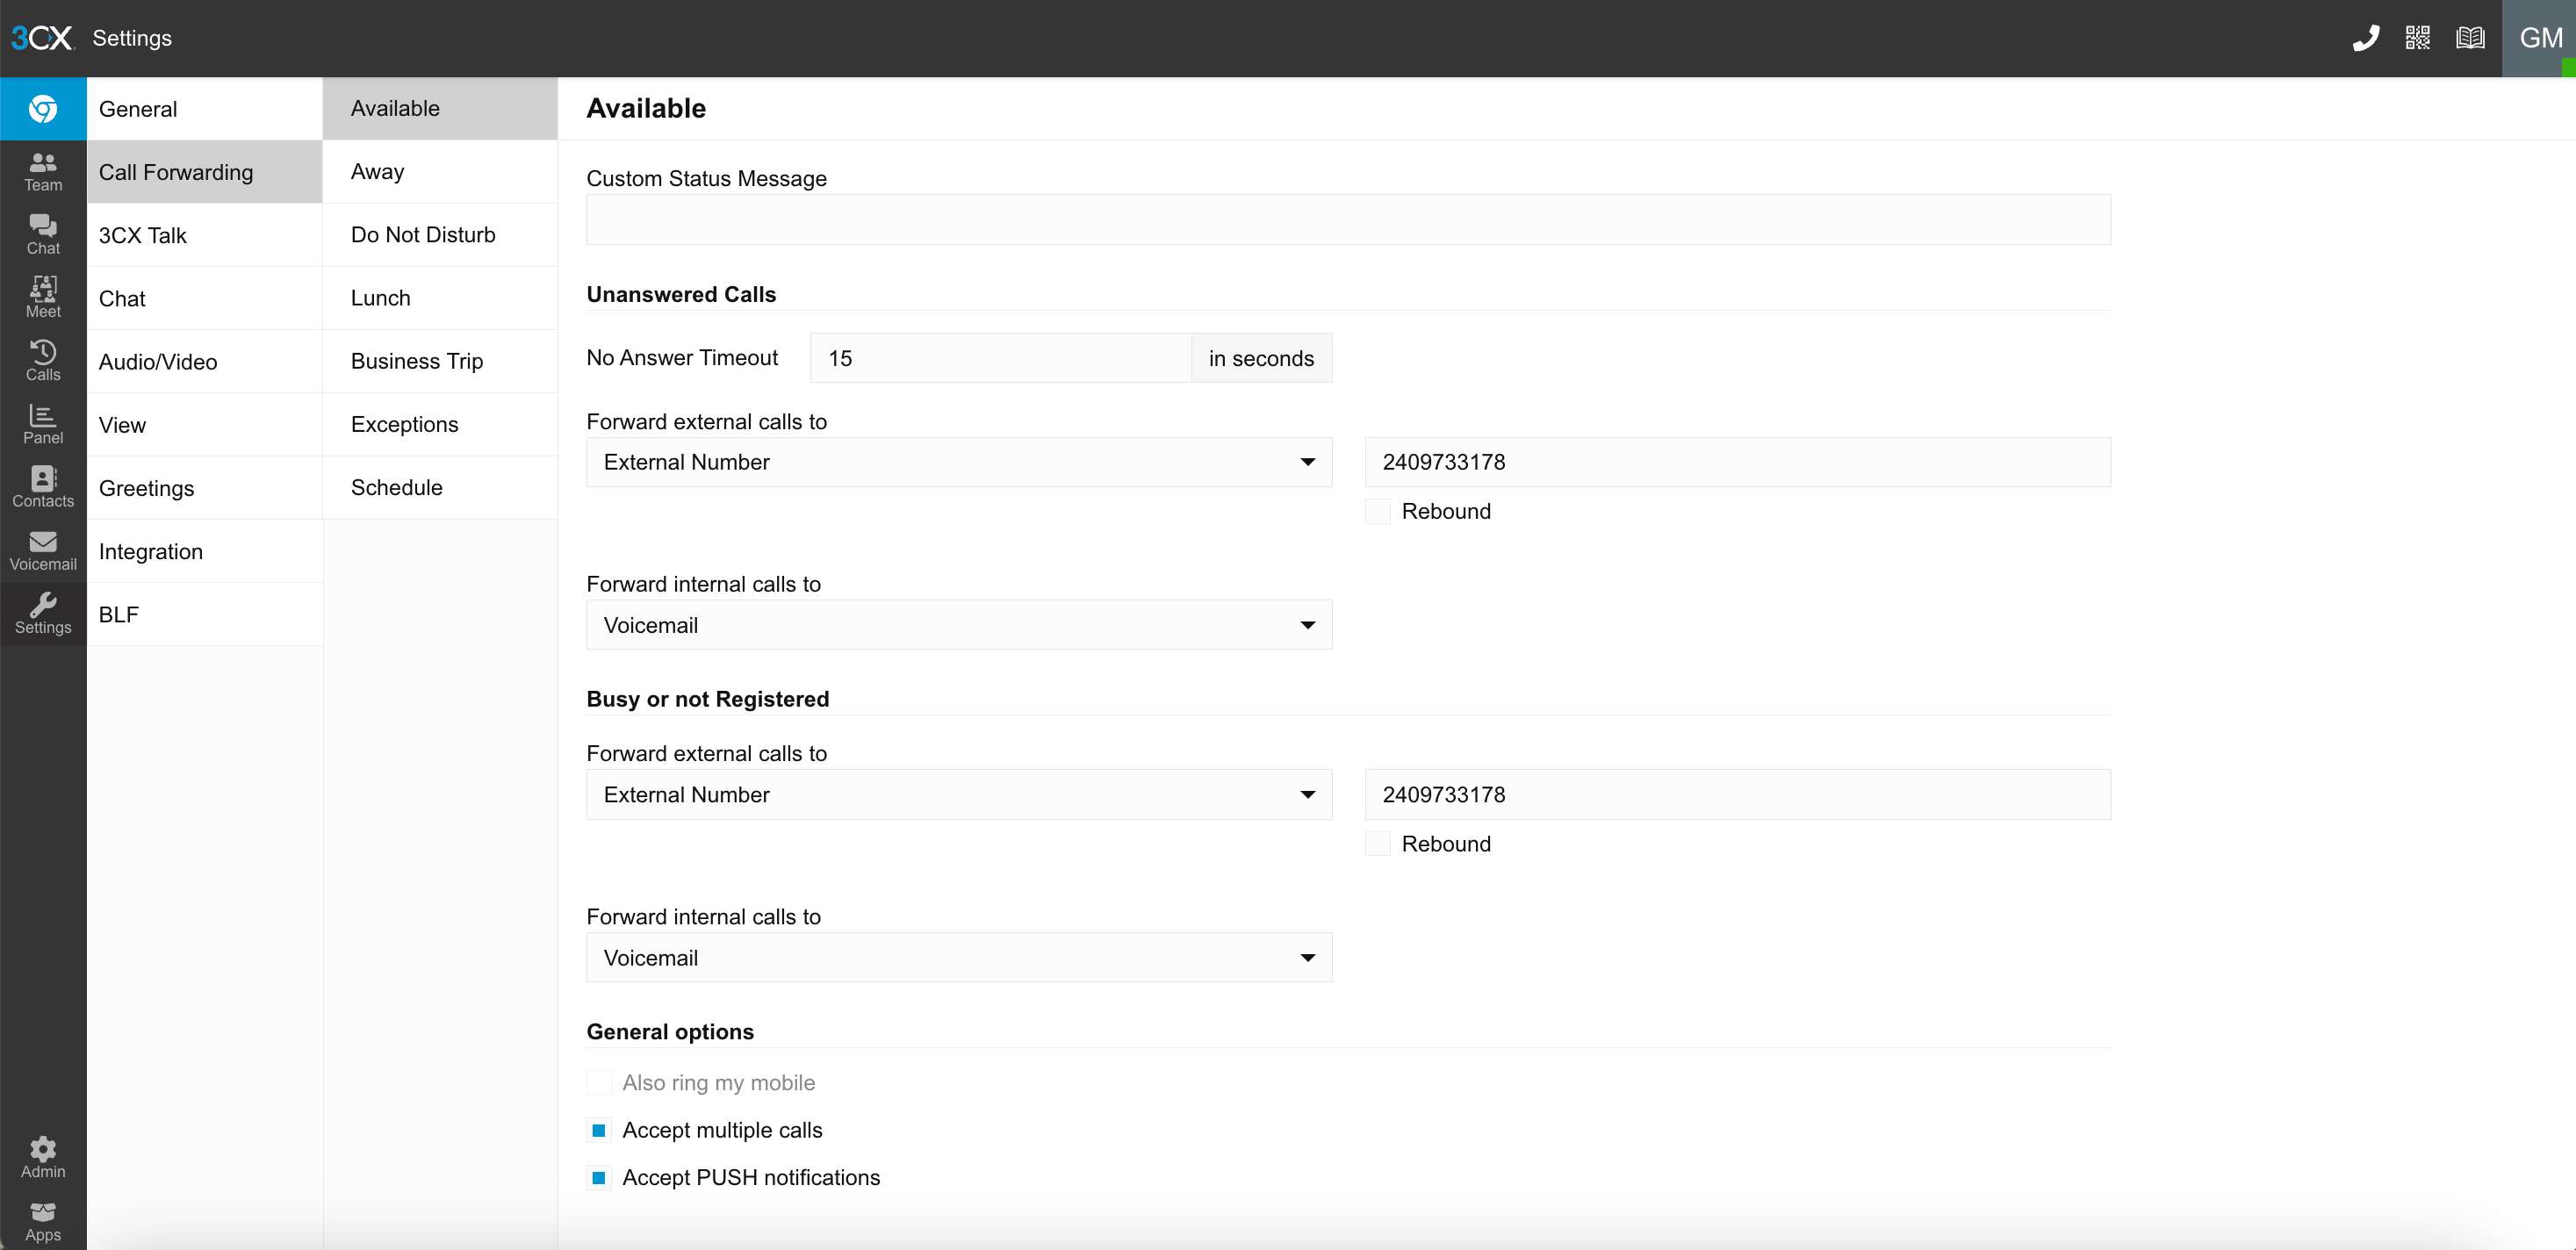
Open the **Call Forwarding → Available** menu.
Under **Unanswered Calls**, set the **No Answer Timeout**. Best practice is typically **15–20 seconds** — the window your CSRs have to pick up before overflow goes to Avoca.
Under **Unanswered Calls**, set **"Forward external calls to" → External Number** and enter your Avoca number.
Under **Busy or not Registered**, set **"Forward external calls to" → External Number** and enter your Avoca number.
Check **"Accept multiple calls"** at the bottom (if appropriate for your setup).
## Setting Up Avoca for Overflow
This makes your phones ring first during business hours, then forwards to Avoca if nobody answers.
Open the **Call Forwarding → Available** menu.
Under **Unanswered Calls**, set the **No Answer Timeout**. Best practice is typically **15–20 seconds** — the window your CSRs have to pick up before overflow goes to Avoca.
Under **Unanswered Calls**, set **"Forward external calls to" → External Number** and enter your Avoca number.
Under **Busy or not Registered**, set **"Forward external calls to" → External Number** and enter your Avoca number.
Check **"Accept multiple calls"** at the bottom (if appropriate for your setup).
 **Once you've completed this process, place a test call during business hours for overflow, and a call after-hours, to ensure routing is working correctly.** This final step matters because the process can differ slightly for each company on 3CX depending on your setup.