

Your Avoca forwarding number is provided by your Customer Success Manager.
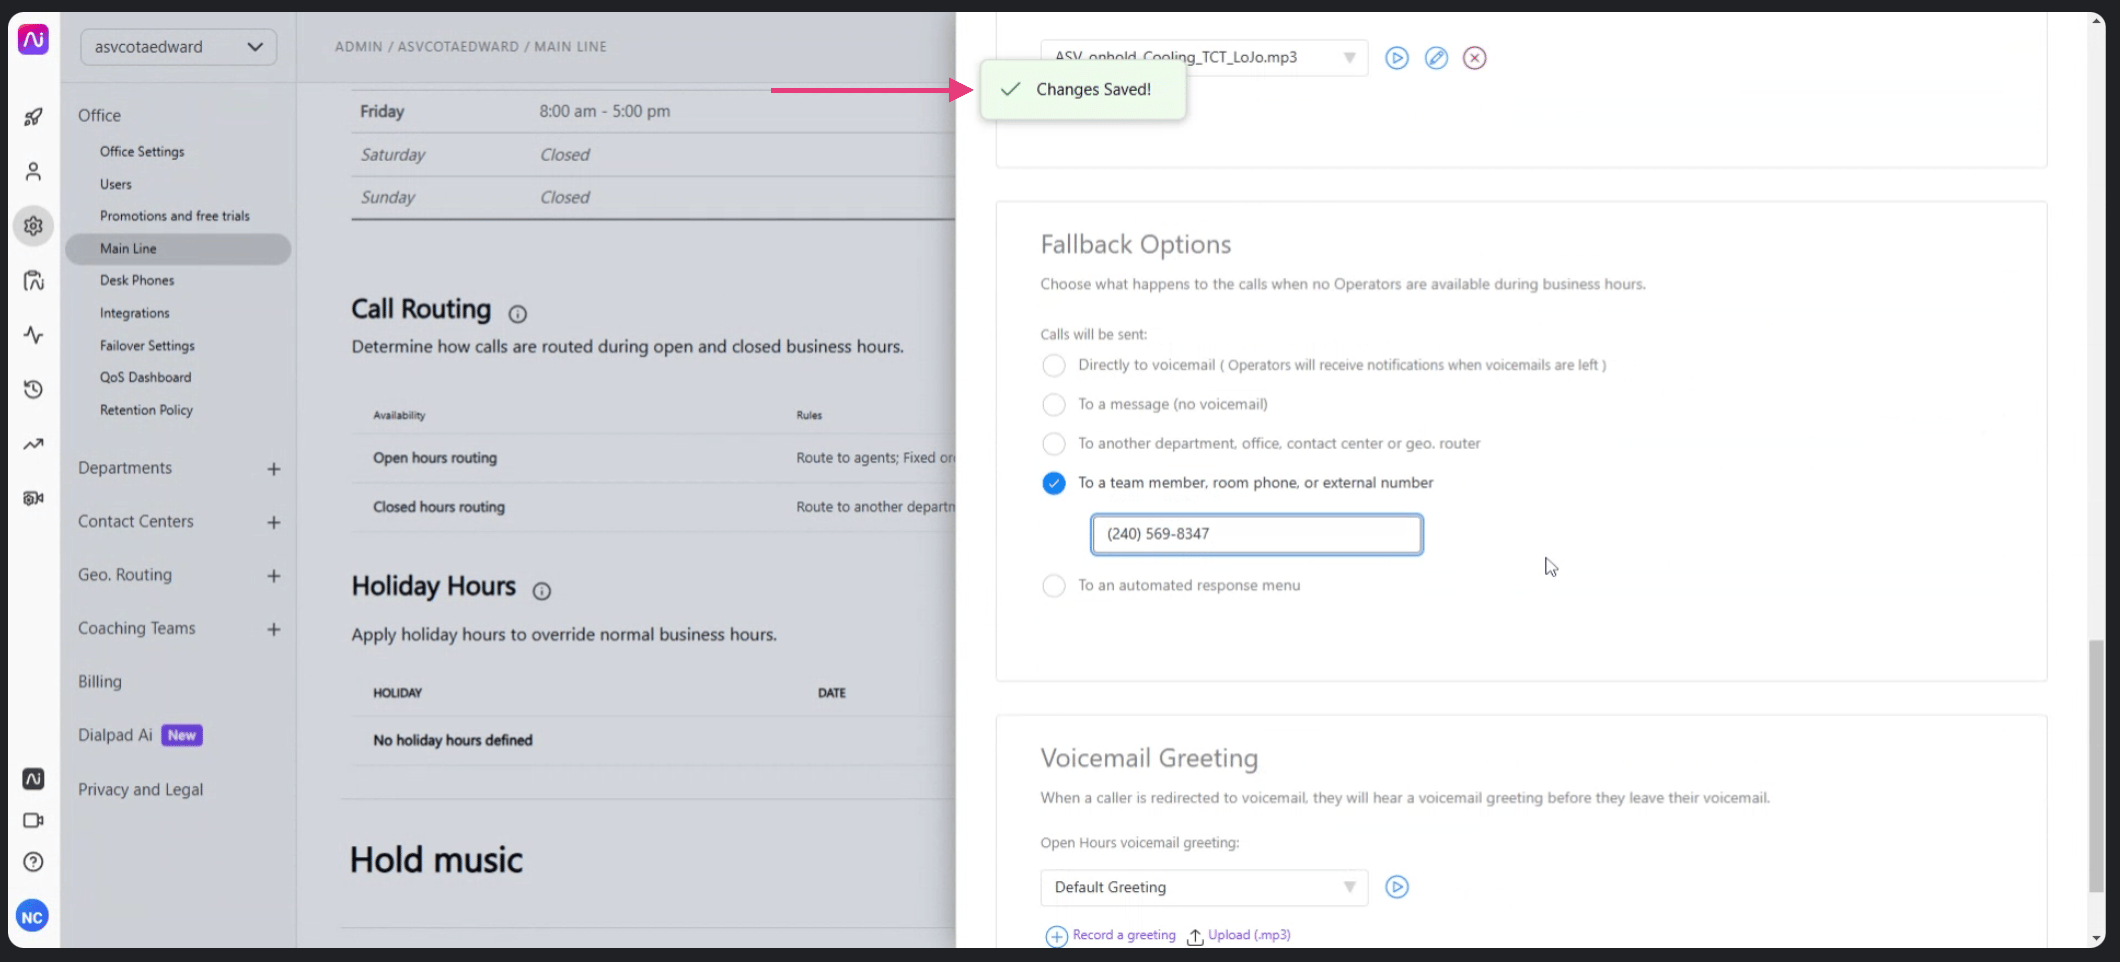
Set Avoca as Your Fallback (Overflow)
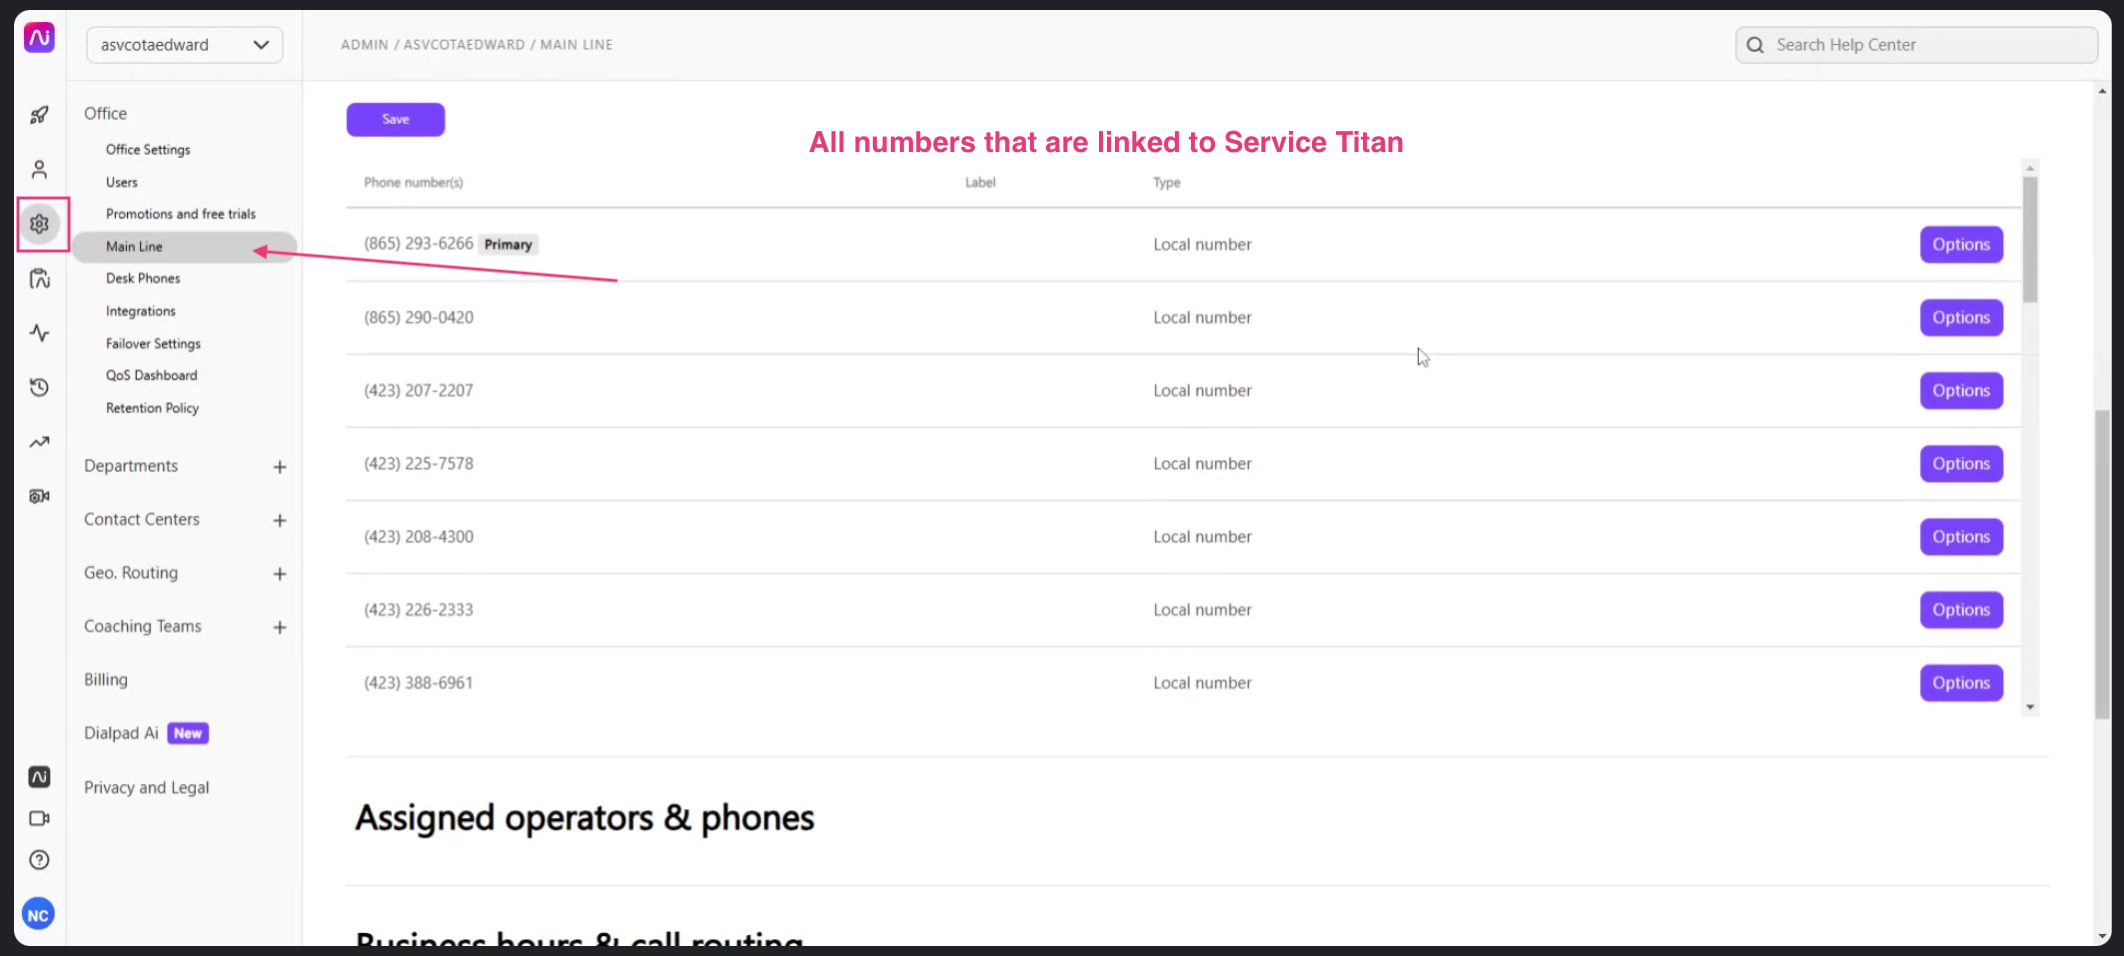
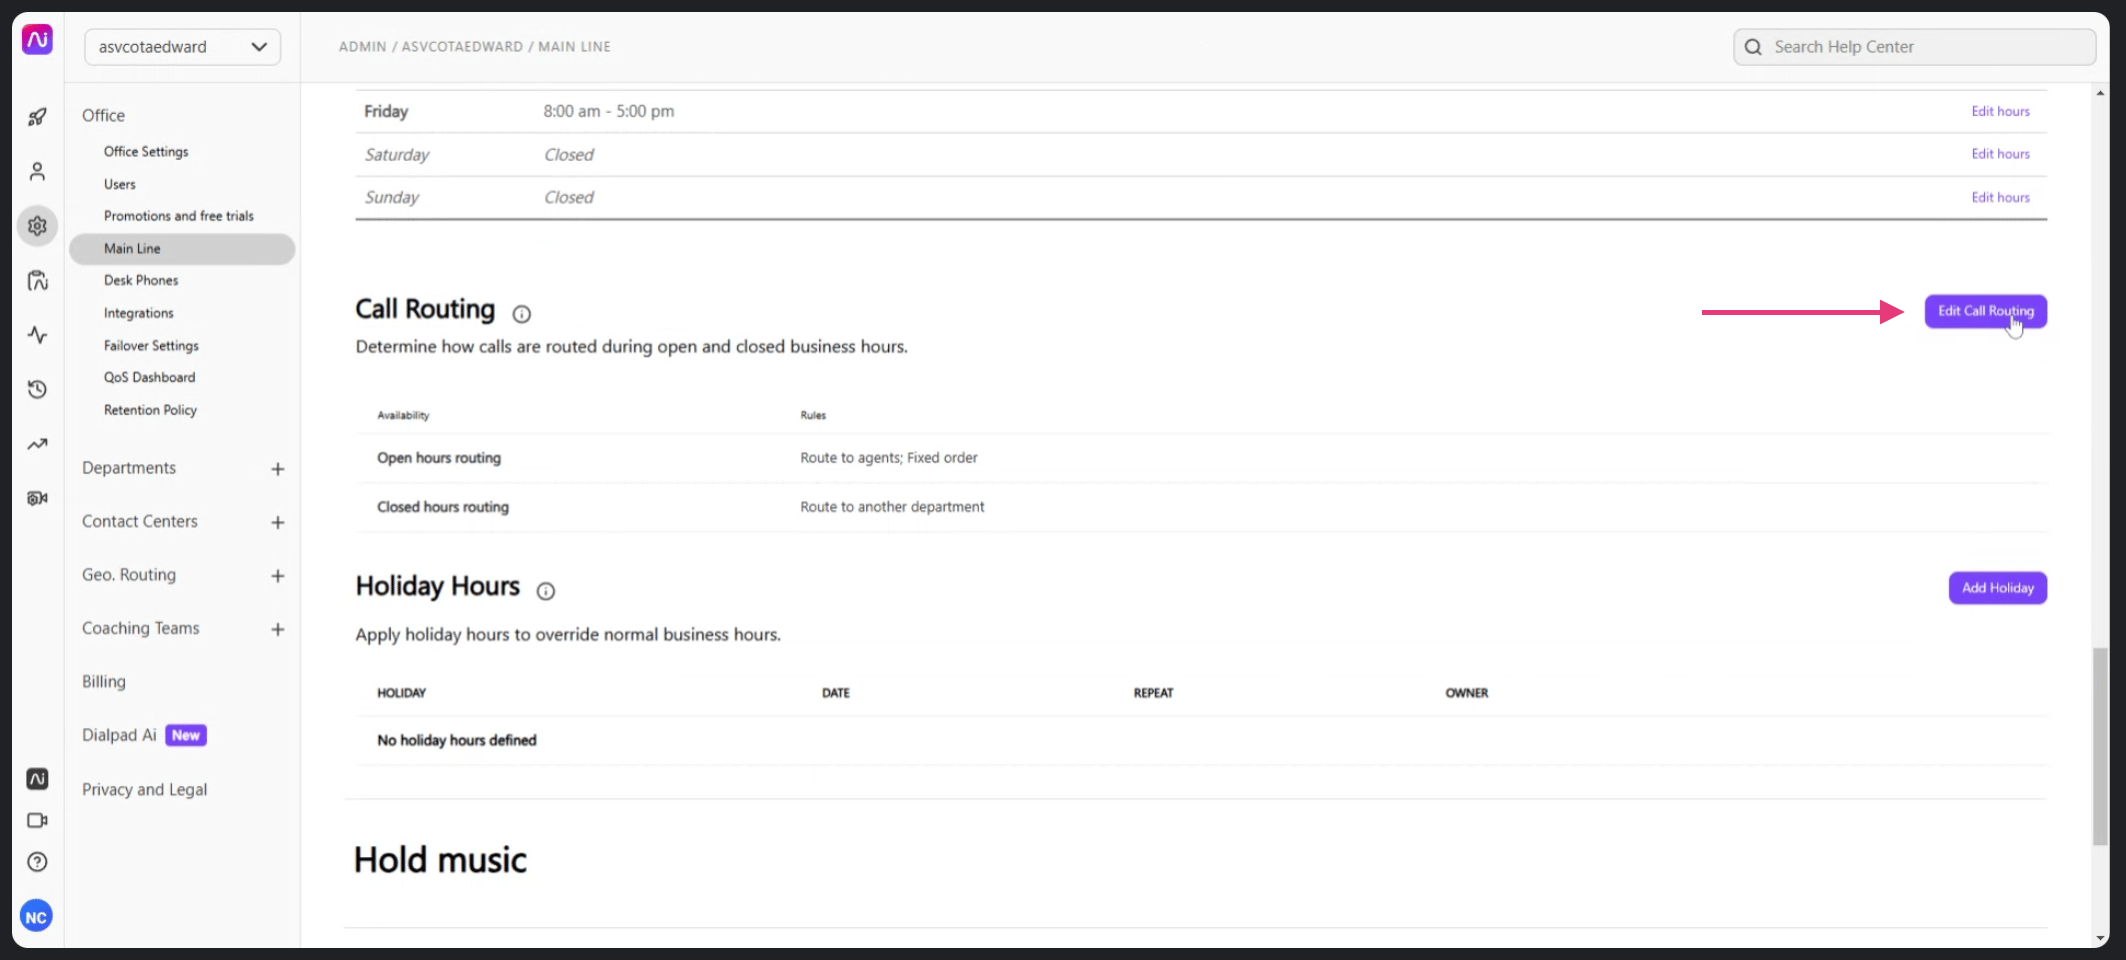
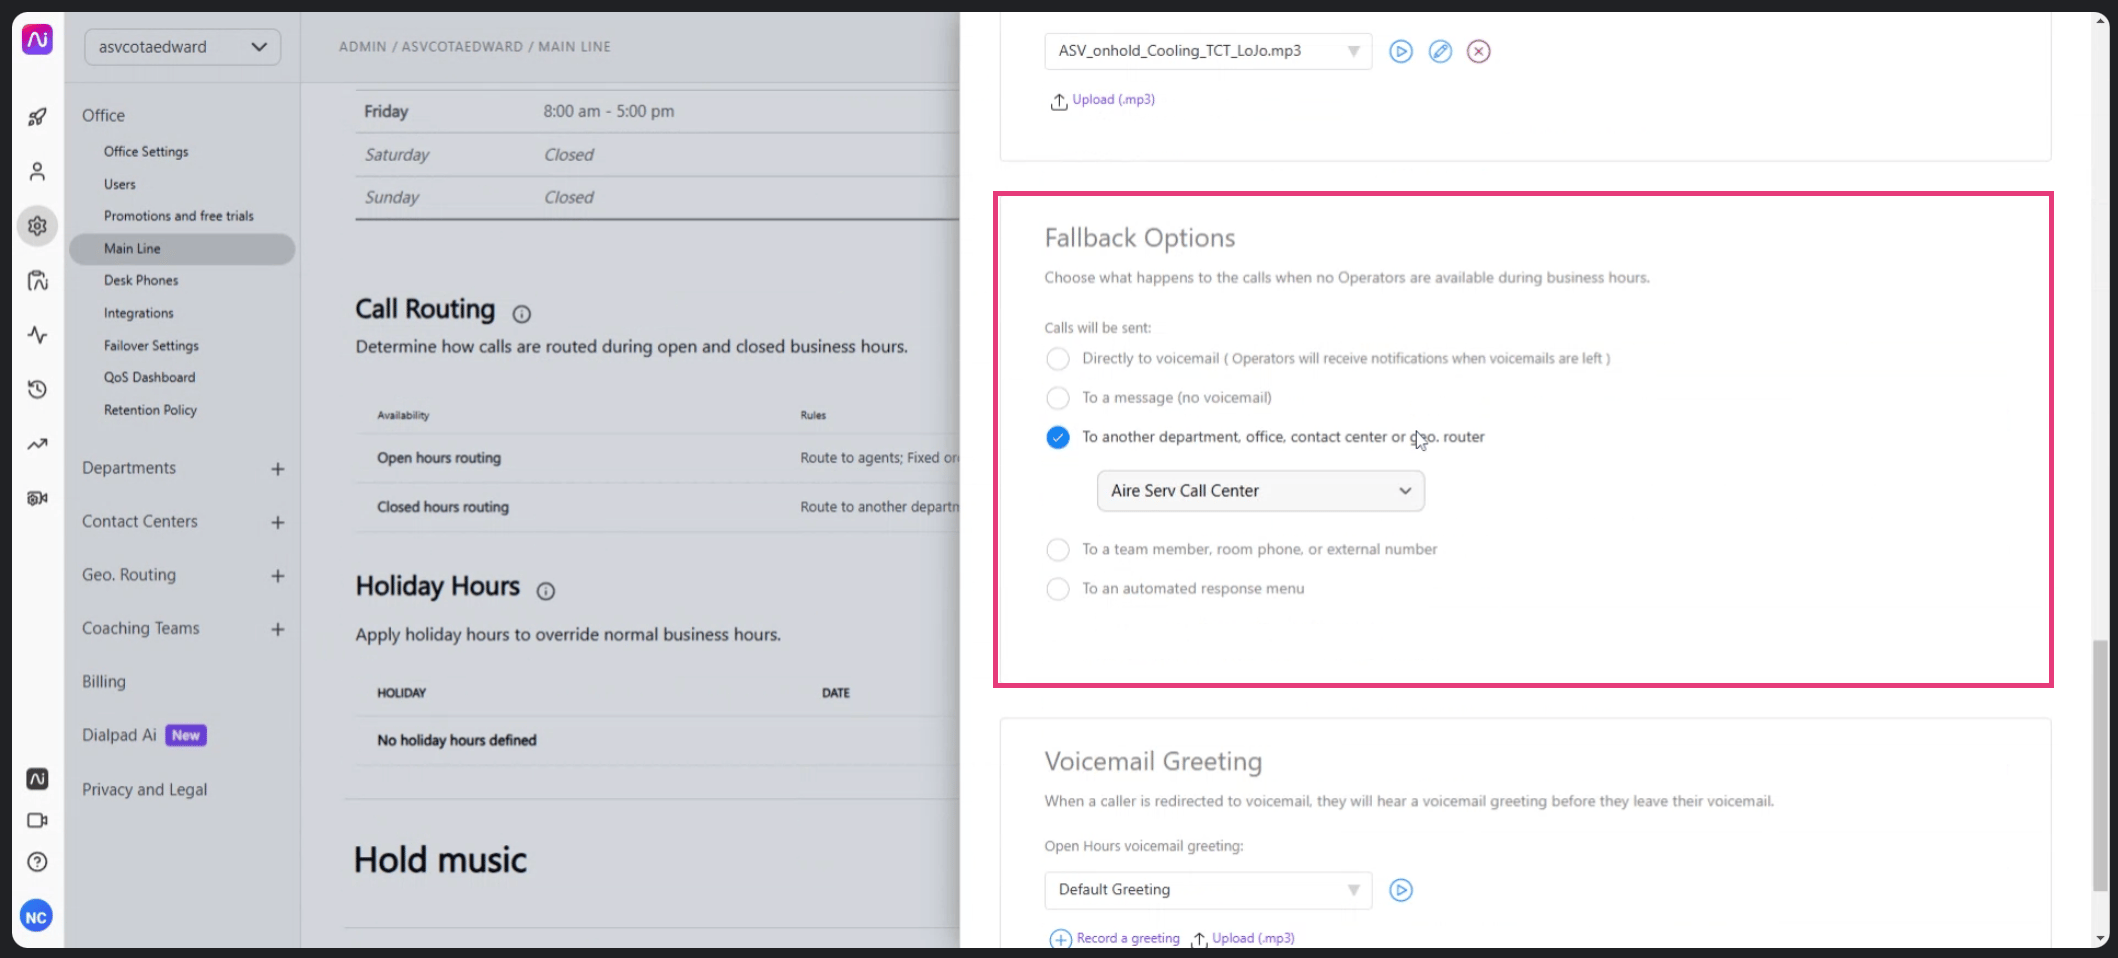
Add your Avoca number
Click “To a team member, room phone, or external number” and add your Avoca number. Press Enter.If you don’t see this option enabled, contact Dialpad Customer Care and they’ll help enable it.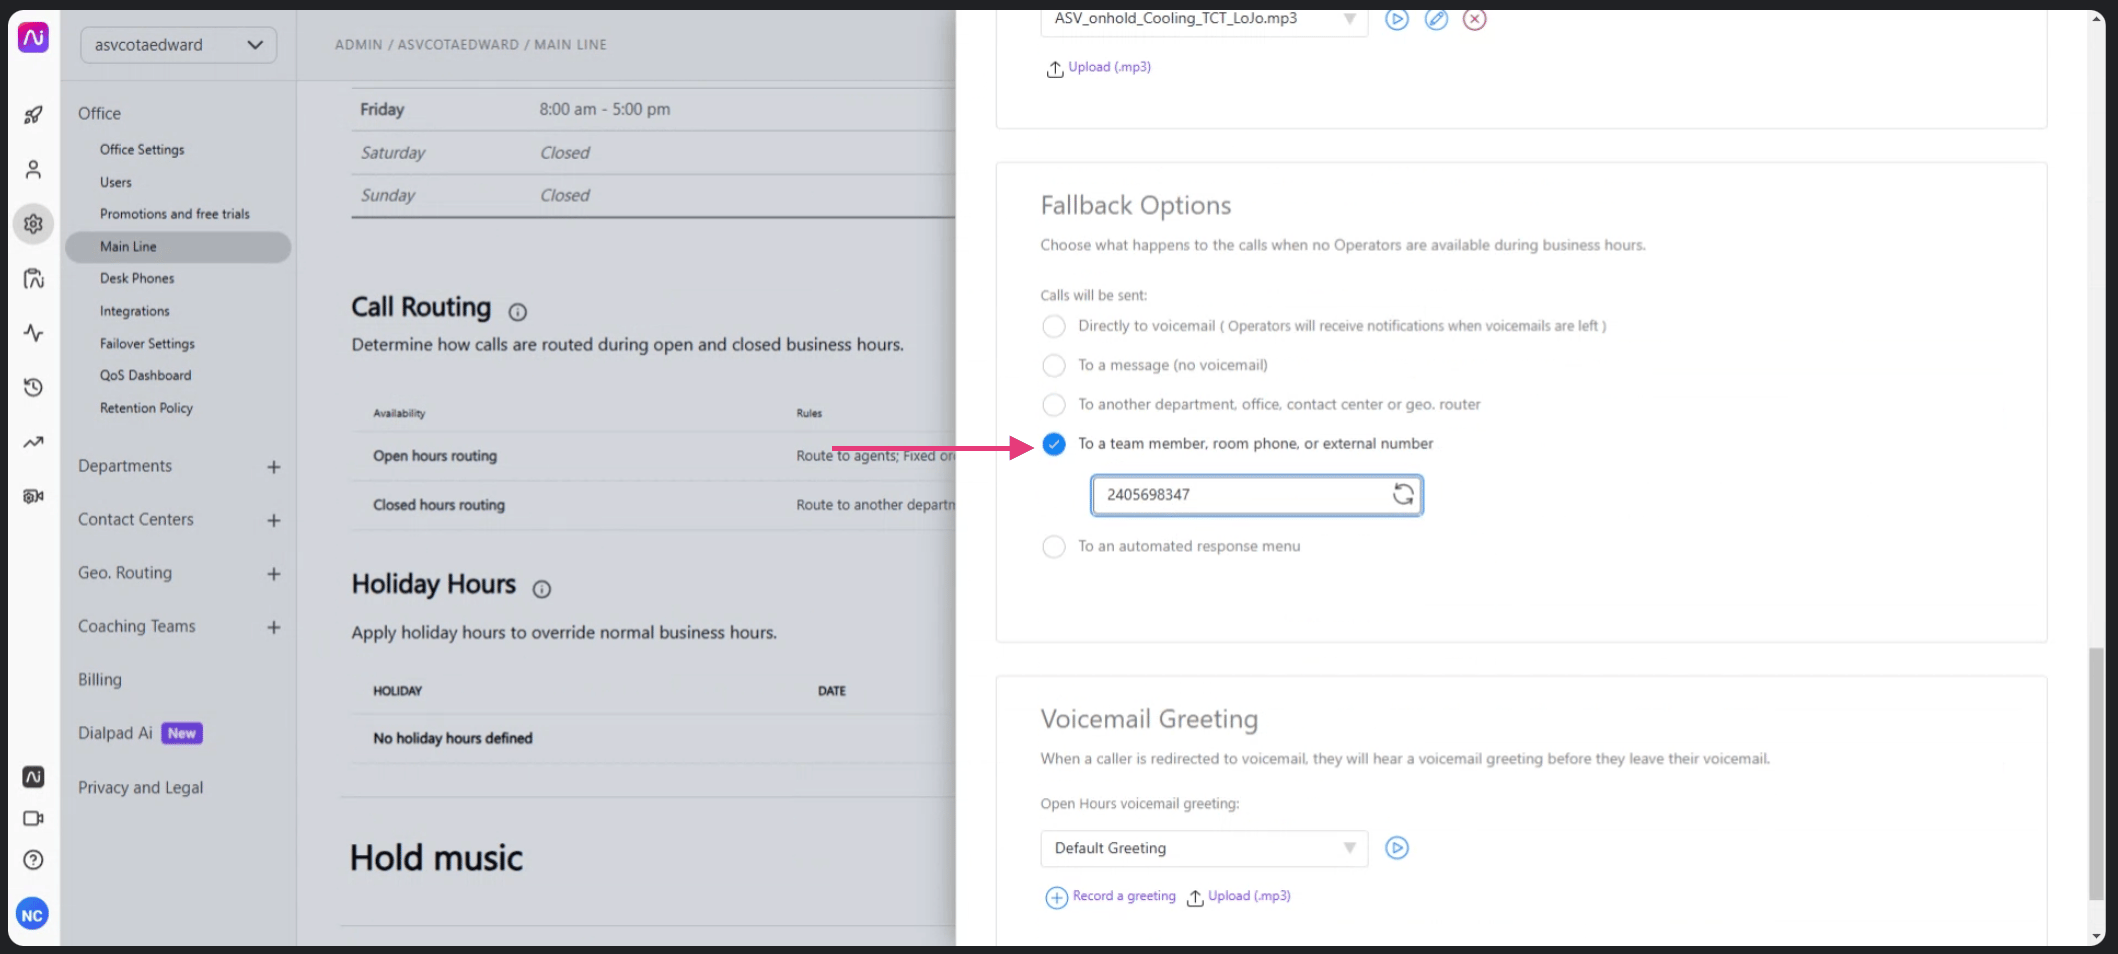
Set Avoca as Your After-Hours Routing
Open Closed Hours Routing
In the same Edit Call Routing view, select Closed Hours Routing and make sure Routing Options is set to No Operator.
Add your Avoca number
Click “To a team member, room phone, or external number” and add your Avoca number.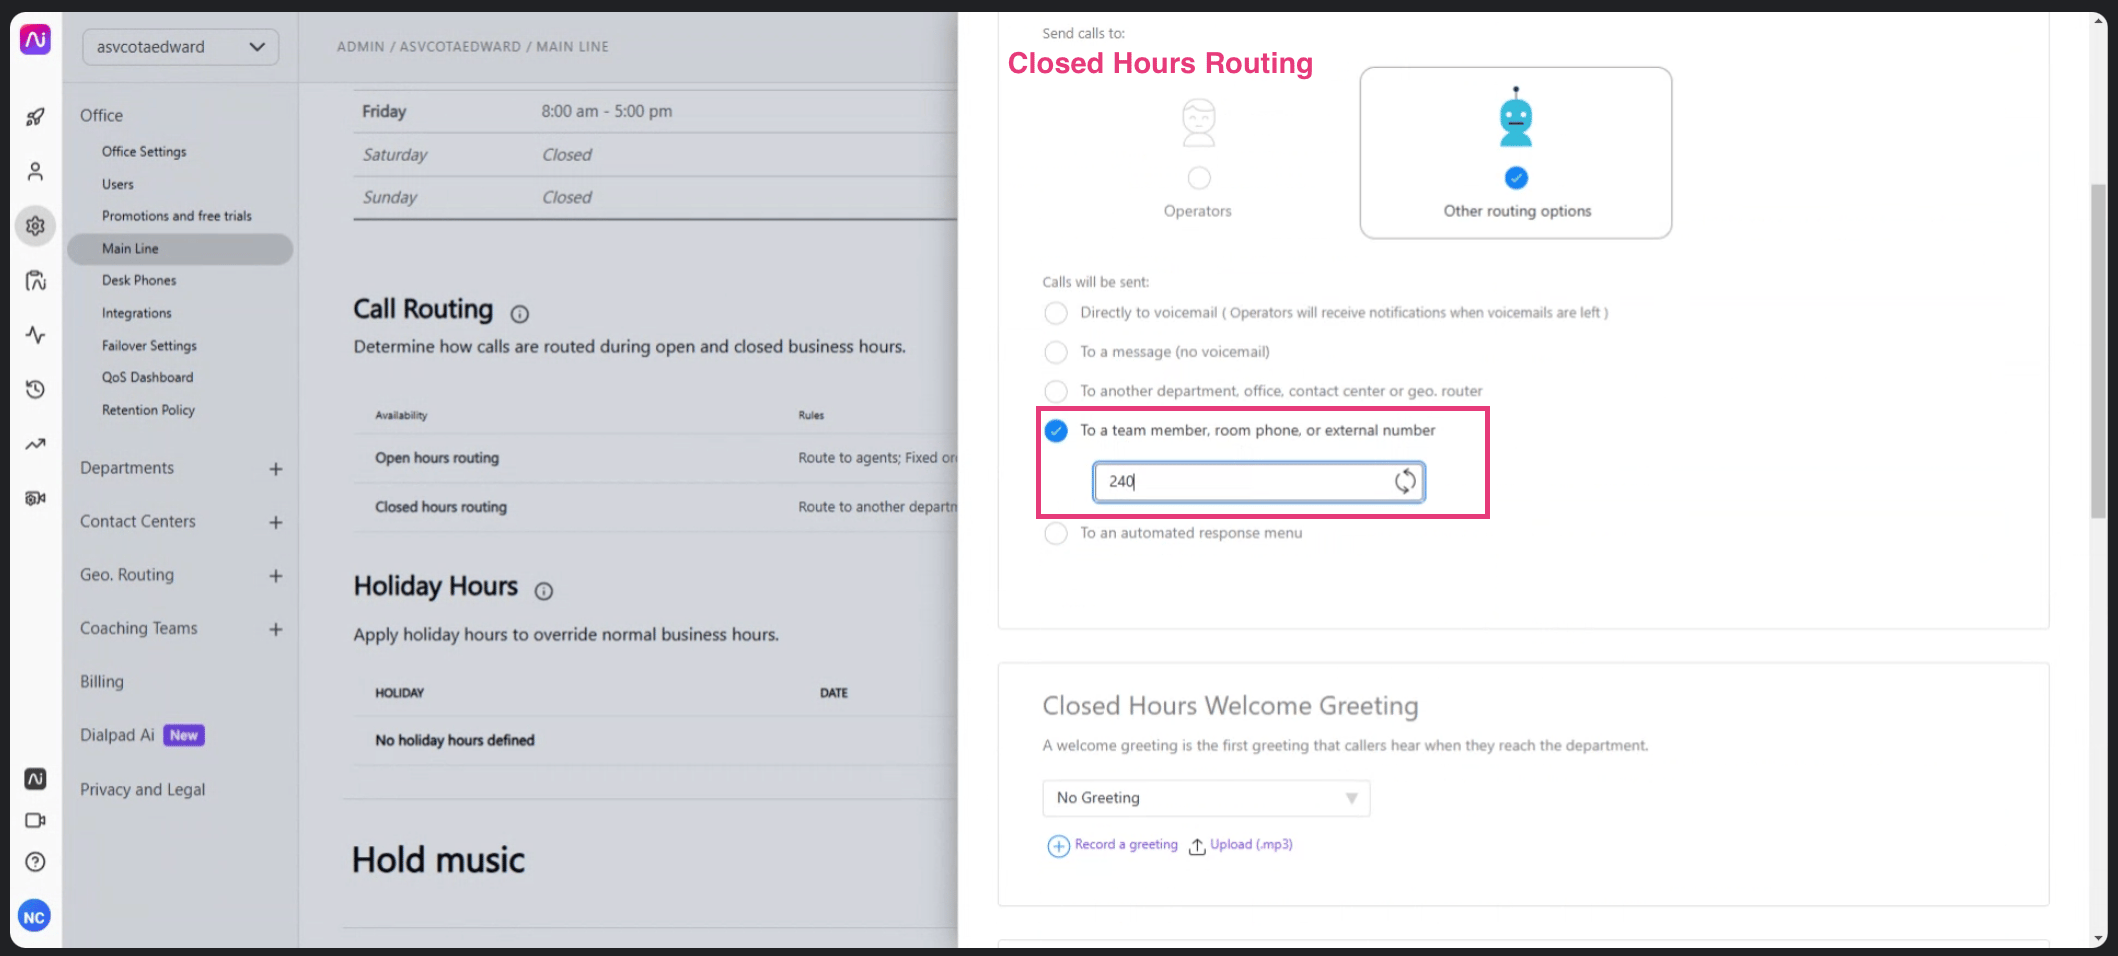
Troubleshooting
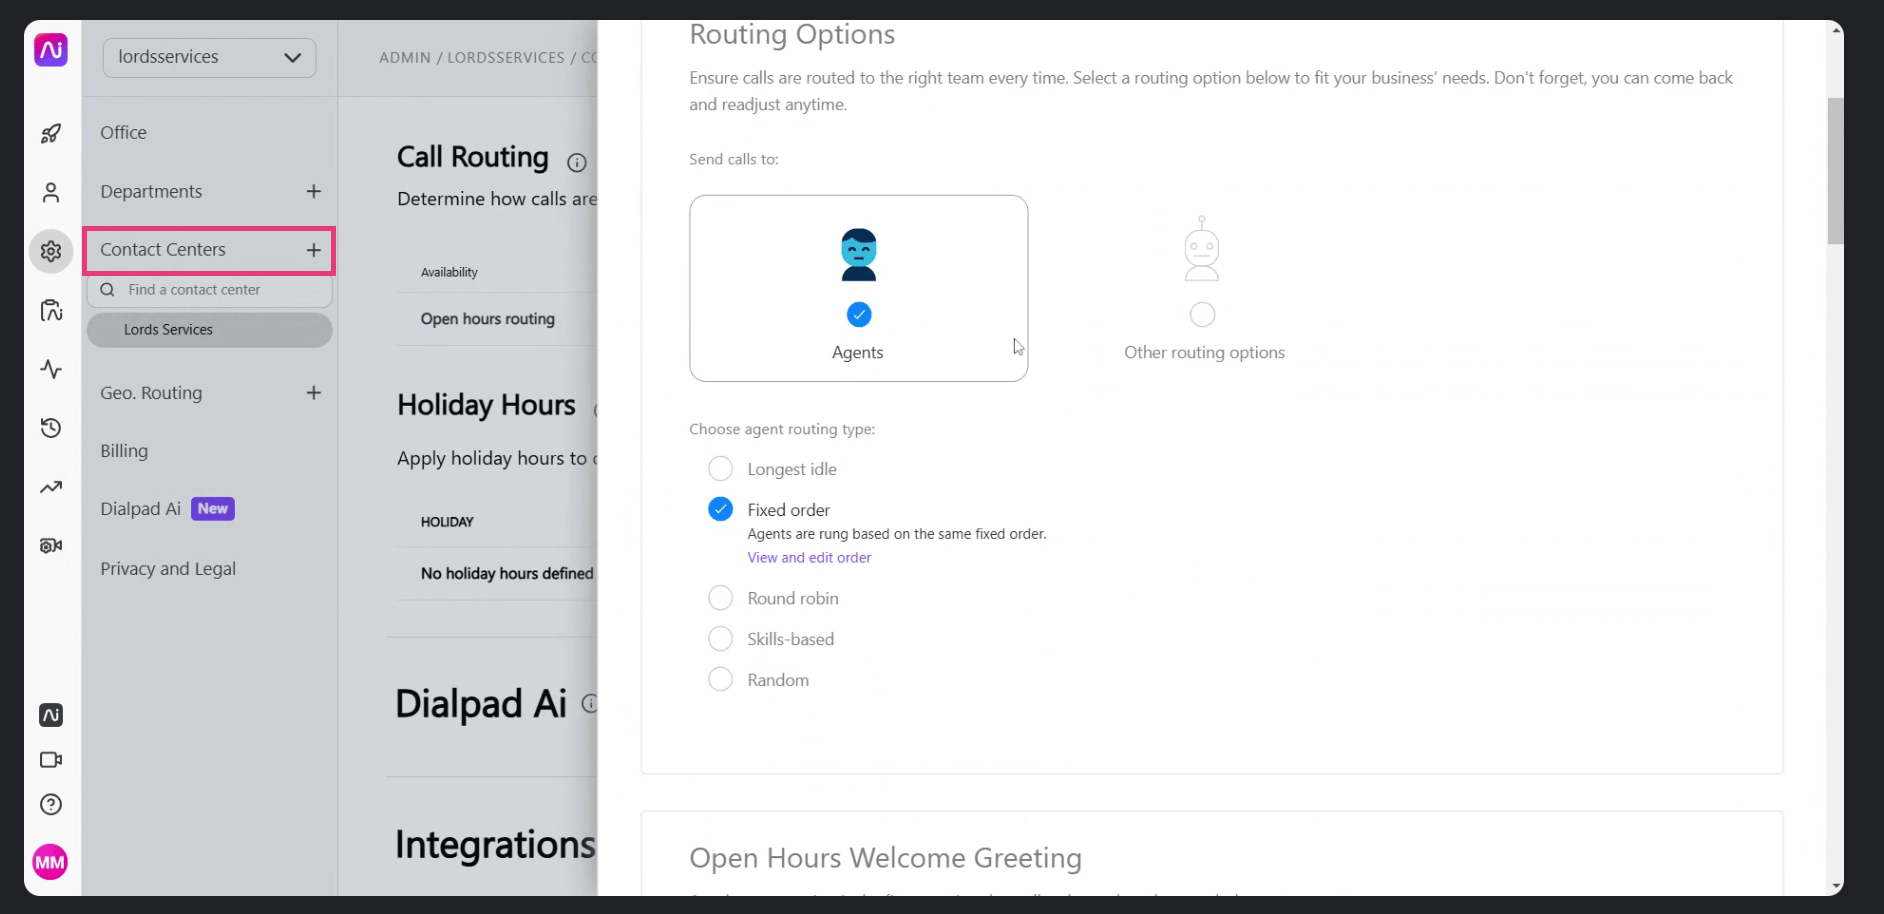
If you don’t see Fallback Options on the Main Line, your calls may route through a default Contact Center instead:- Go to Settings → Contact Center.
- Find the default Contact Center.
- Apply the same fallback and closed-hours steps inside the Contact Center’s routing settings.
Removing the “This Is a Recorded Call” Announcement
To prevent the recorded-call announcement from playing when your Avoca number answers, add the Avoca number to Dialpad’s recording exception list: For Departments:- Log in to Dialpad and open your Admin Settings.
- Click Departments and choose the department to configure.
- Open Advanced Settings and find Automatic Call Recording.
- Check “Automatically record calls to this department”, then click Edit Exception List.
- Add the Avoca number (or its area code) to exclude it from recording and the announcement.
- In Admin Settings, click Contact Centers and choose the one to configure.
- Open Advanced Settings and find Automatic Call Recording and Transcription.
- Select which call types to record, then click Edit Exception List and add the Avoca number.
Calls to or from a number on the exception list are not recorded by Dialpad and the announcement is omitted. Useful for complying with regional call-recording laws — note that Avoca’s own call recording and disclosure settings are configured separately in your Avoca account.